

How To Create A Tag In Asana
Task fields & Tags
- Skip Ahead to
- Mark tasks complete & incomplete
- Due dates & due times
- Recurring Tasks
- A task's associated projects
- Task Description
- Likes
- Tags
All task fields can be found and modified from the right pane. Click any task to reveal its details in the right pane right pane The right pane holds the details of a task or Conversation.Read more .
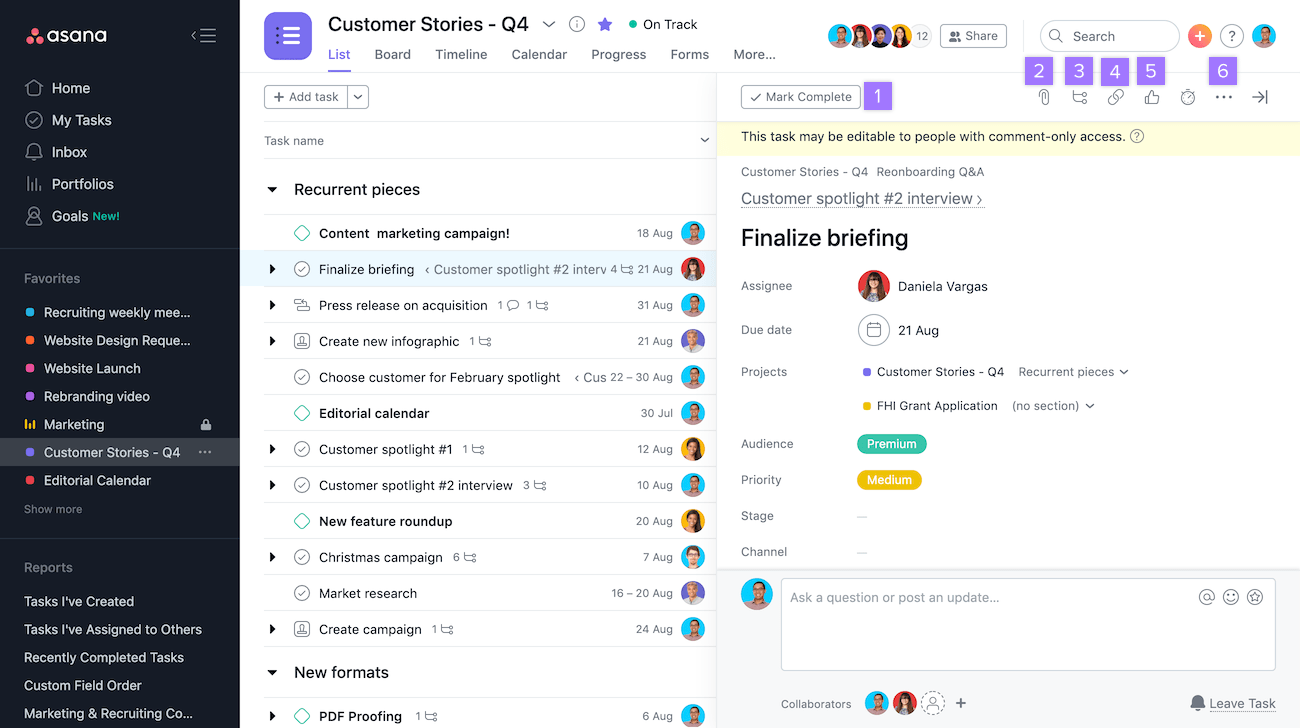
From the top of the right pane, you can:
- Mark the task complete complete To mark a task with a checkmark to indicate that it is done.Read more or incomplete
- Upload attachments attachments A file that is attached to a task or conversation.Read more
- Build a list of subtasks subtasks Subtasks break a task into smaller pieces. Subtasks, like tasks, have assignees, due dates, comments, and hearts.Read more
- Copy the task url
- like like Read more the task
- Access additional task options
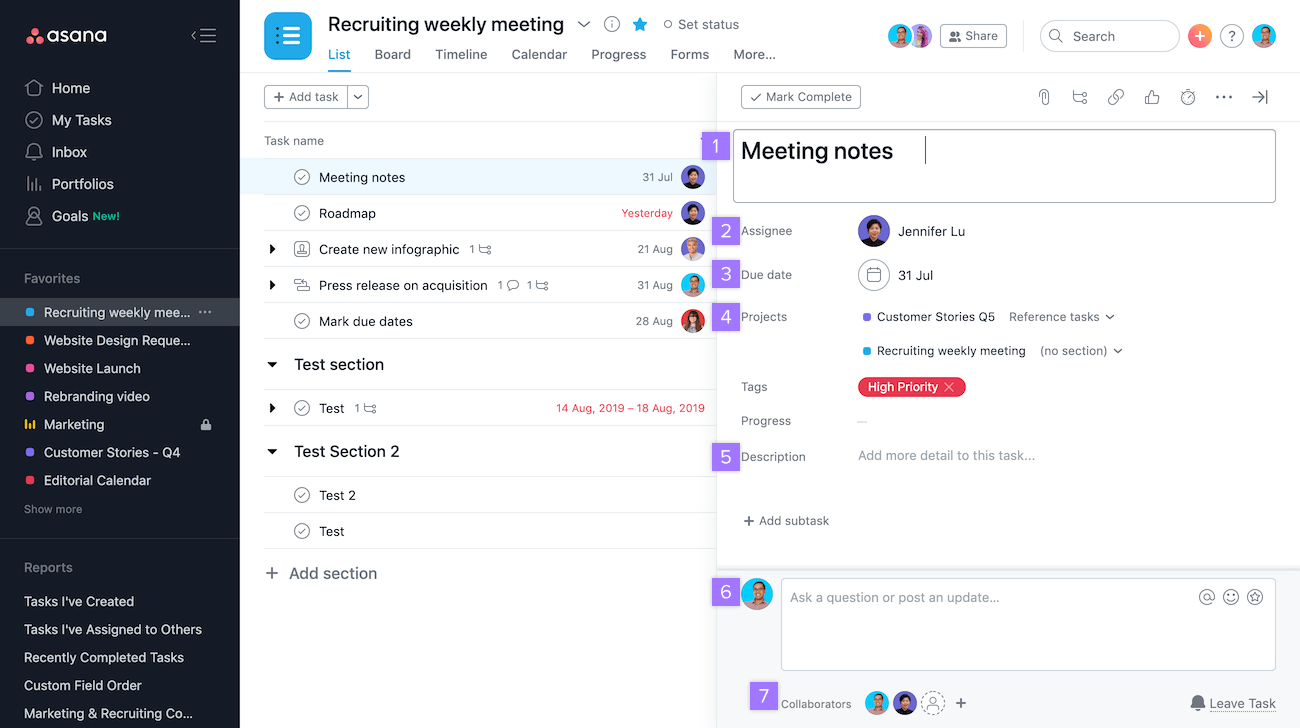
From the right pane, you can also:
- Edit the task's name
- assign assign The person responsible for the task or subtask. Asana allows one assignee per task or subtask.Read more the task
- Set a due date due date The date that a task or subtask is due.Read more & due time
- Identify what project the task is in
- Add a description to give the task more context
- Post a comment comment Comment on a task or conversation to offer help, answer questions, and help move work forward.Read more
- Add a Collaborator Add a Collaborator Read more or remove yourself as a collaborator on the task
Task Name
Task names are often the calls to action for the task.
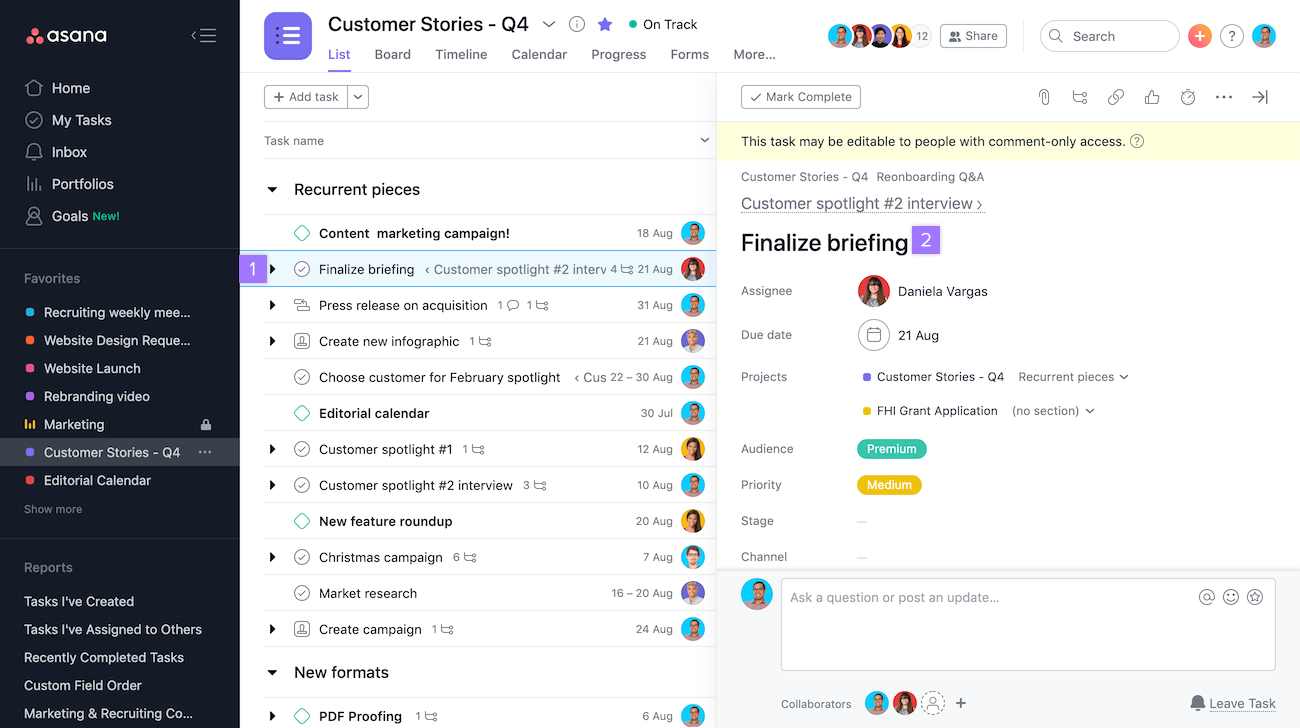
You can change the name of a task either:
- Inline from the left pane left pane Read more
- From the task name field in the right pane right pane The right pane holds the details of a task or Conversation.Read more
Mark tasks complete or incomplete
Mark a task complete to indicate that it is done.
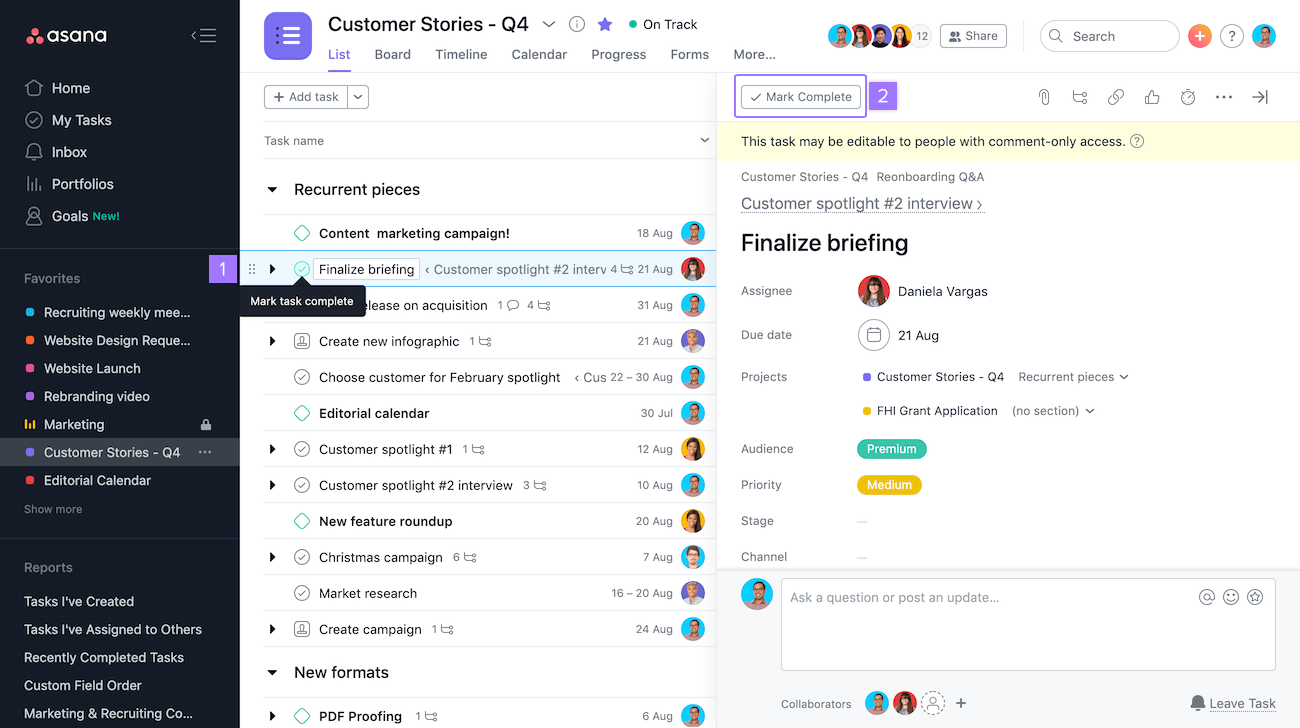
You can mark a task complete by either:
- Clicking the check icon from the left pane
- Clicking the Mark Complete button from the right pane
Conversely, you can mark a task incomplete again if there is still work to be done.
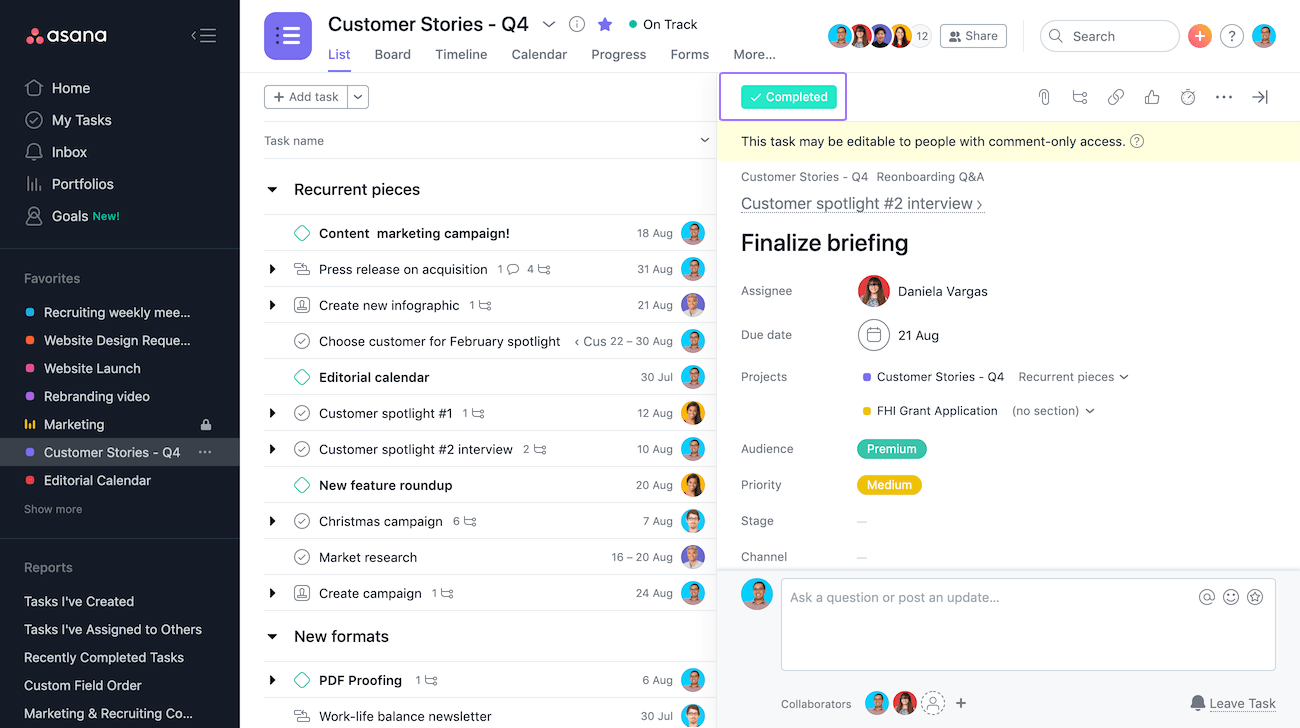
To mark a task incomplete again:
Click the Completed button from the right pane
By default, only incomplete tasks will appear in your My Tasks and projects. You can change the View to also show completed tasks. With completed tasks shown, you can also mark a task incomplete from the main pane.
Task Due Dates, Due Times & Date Ranges
Set a due date, due time, or a date range to let your teammates know when a task should be completed by.

To add a due date:
- Navigate to Due date and either type a date or select it from the Calendar.
To remove a due date to add a more realistic time frame simply change in the Calendar and the new date will immediately appear in the Due date bar.
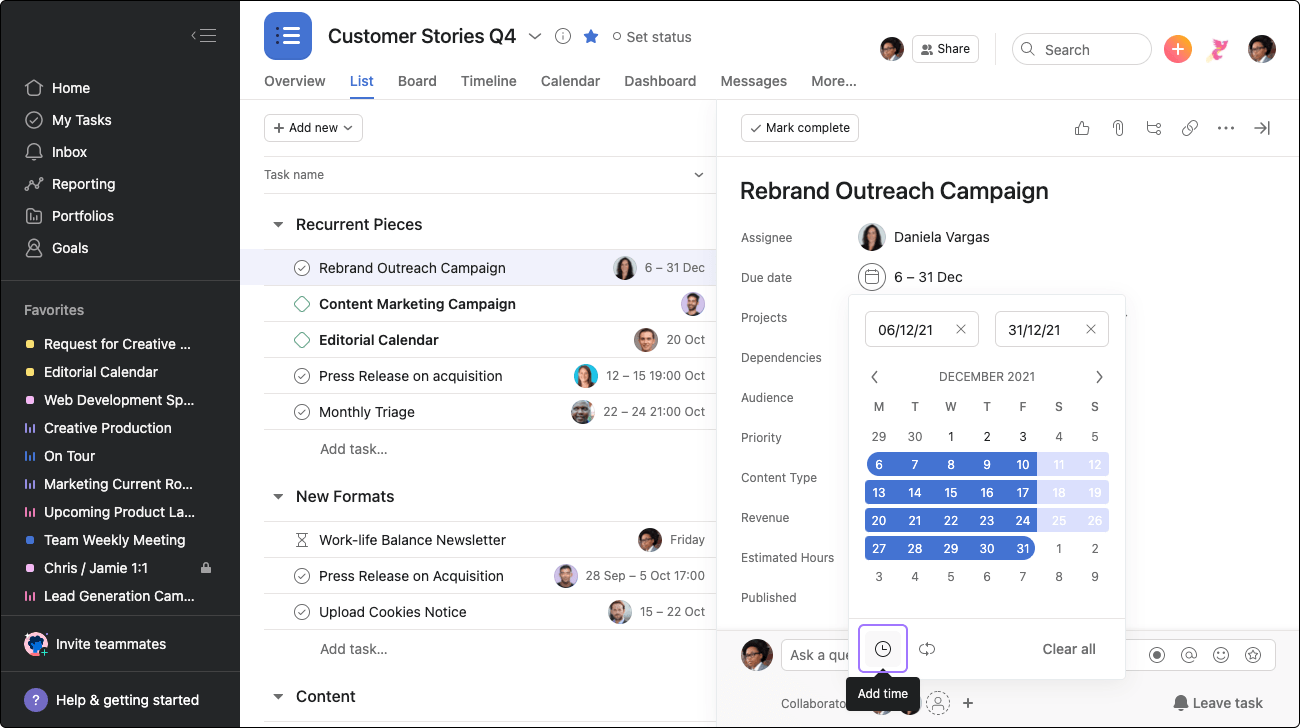
Add start & due time
- Click on the add time icon within the calendar
From here, you can select both start and due dates within the calendar option.
If you only set a task due time with no due date, the due date will default to today's date.
To set a date range:
- From your Calendar you can specify time frames from Start date to Due Date.

Recurring or repeating tasks
If you have a task that you need to complete on a regular basis, you can set it up as a recurring task.
When you set up a recurring task, it will only appear on your Calendar for the next time the task is due, not every single time the recurring task is due in the future. Once you mark a recurring task completed, it will duplicate itself for the next time the recurring task is set to be due.
When a recurring task is marked complete, it will duplicate all the information into a new task with a new due date. The interval you've set for your task's recurrence will determine the new due date.
All fields (except task comments) are copied over when a recurring task copies itself, including subtasks.
To set a task as a recurring task:
- Click into the Due Date field
- Select Set to repeat
- Click on the days that you would like the task in question to recuur
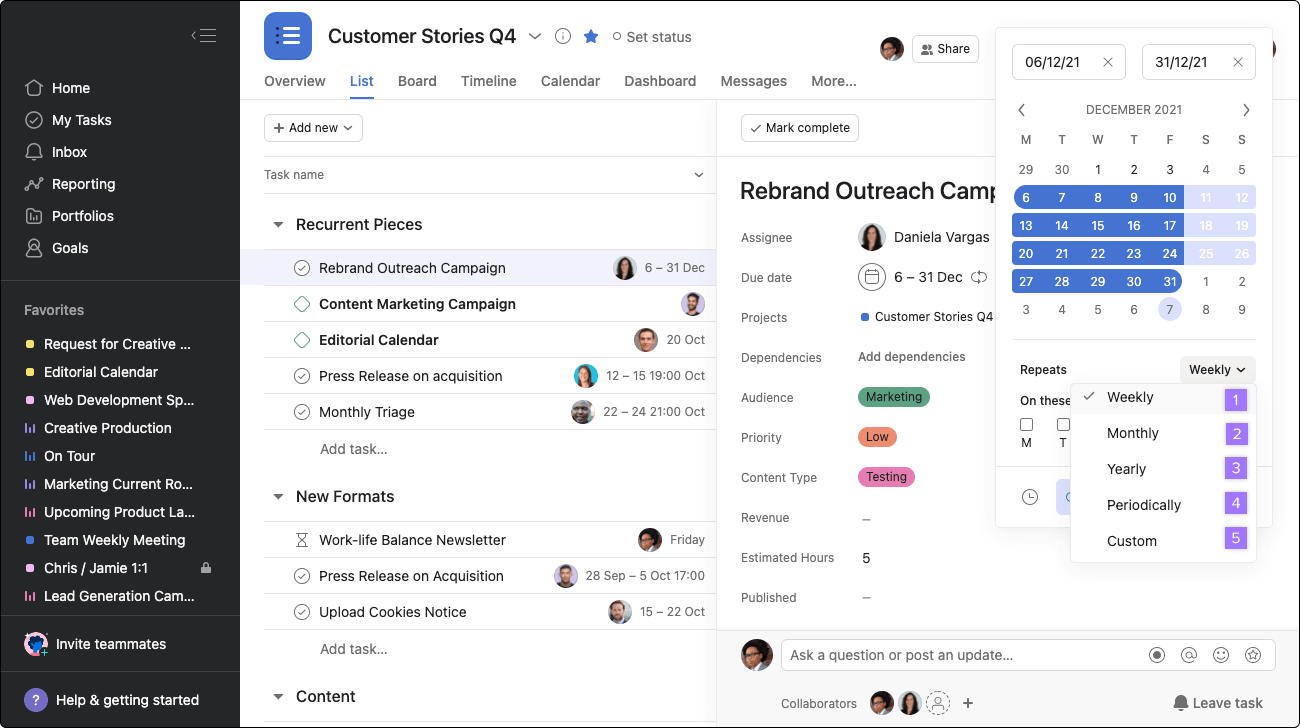
From here, you will have the option to set recurring tasks on a:
- Weekly basis
- Monthly basis
- Yearly basis
- Periodical basis
- Customized basis
If you set a parent task to repeat, do not set any of its subtasks to repeat as well. Doing so will result in the recurring subtask to duplicate exponentially.
Due dates for periodically recurring tasks are determined by the date the task was last completed.
Recurring Task Quick Tips
- If you want a task to repeat on weekdays, set the task to repeat Weekly then check the MTWTF boxes
- If you want a task to repeat quarterly, set the task to repeat Monthly and select to repeat every 3 months
- If you want a task to repeat bi-annually, set the task to repeat Monthly and select to repeat every 6 months
You can also stop a recurring task from repeating ever again by clicking on the remove repeat option.
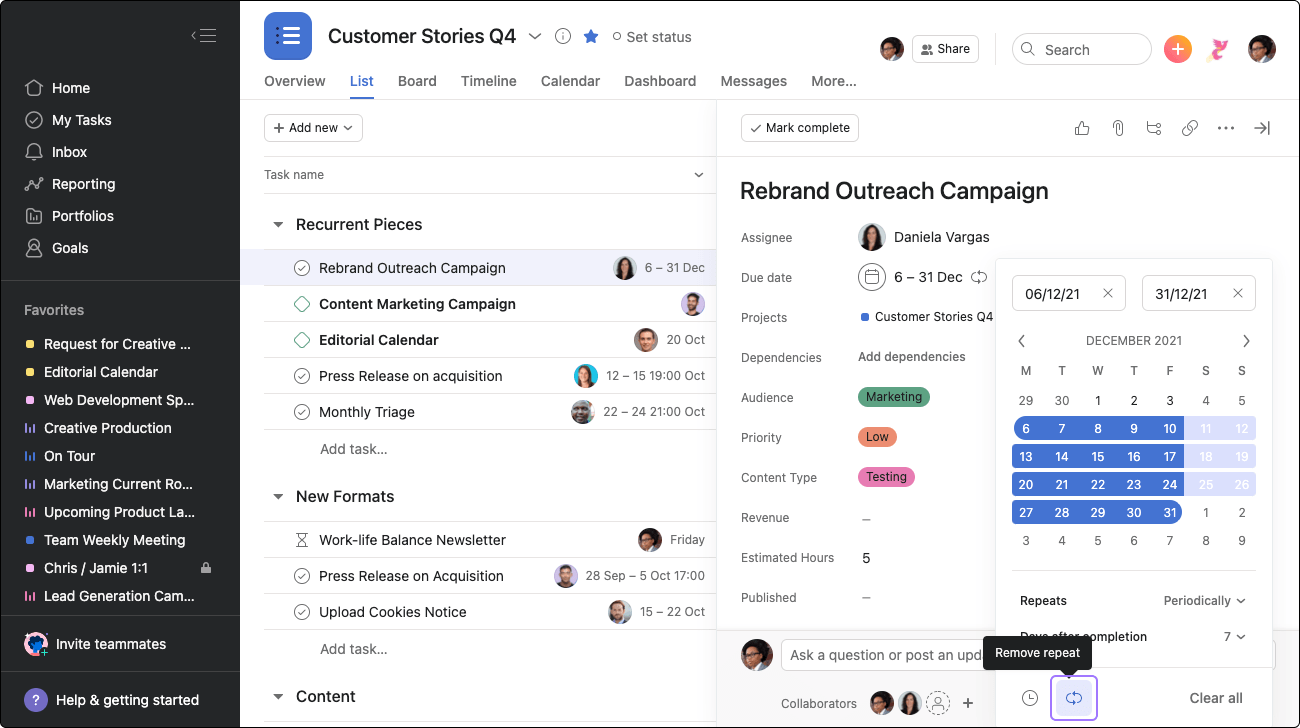
Alternatively, removing the entire due date from the task will stop the task from repeating again.
A task's associated projects
A task can belong to up to 20 different projects at any given time. You can see all projects a task belongs to in the projects field in the right pane.
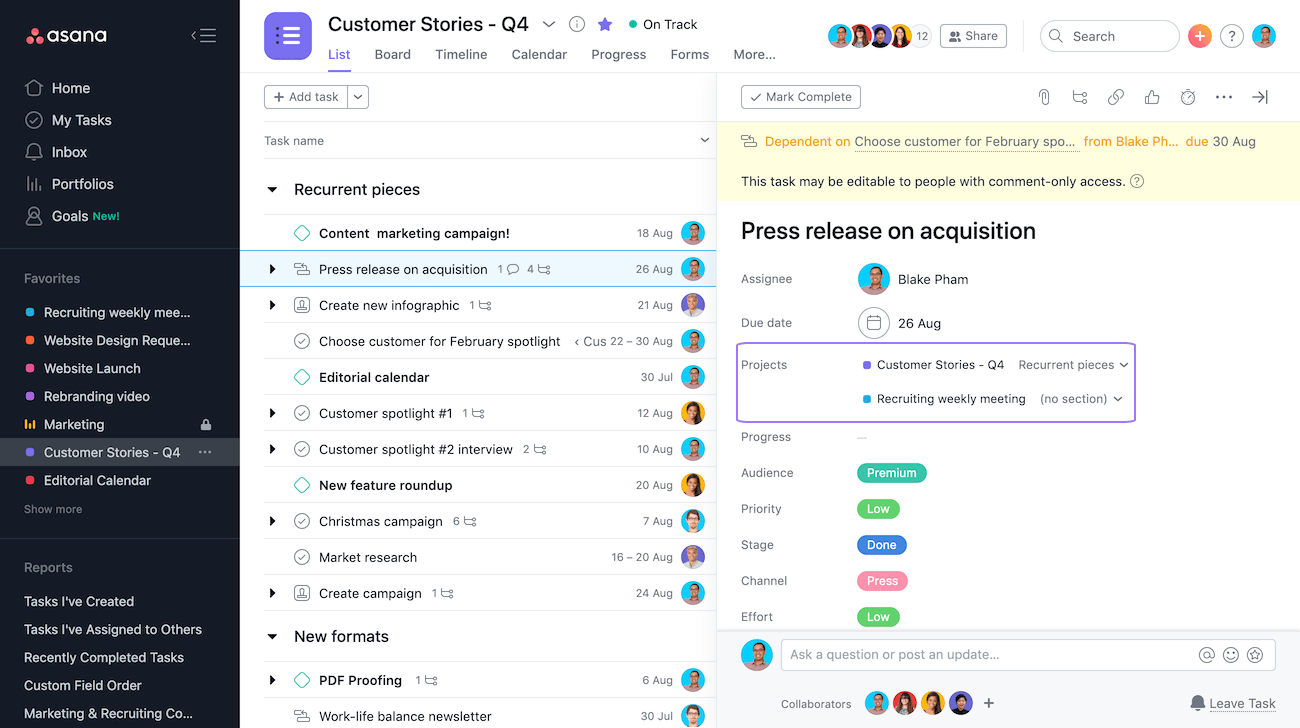
A task's associated projects will appear:
- Under the due date in the right pane. You can also view which section it belongs to in a project.
You will see the task in every project that it is associated with. This is useful when a task might be relevant to concurrent goals and when its due date and completion is relevant to multiple projects.
The task will exist simultaneously in all of those projects. This will not duplicate the task - if you complete the task in one project, it will be completed in all projects it is associated with.
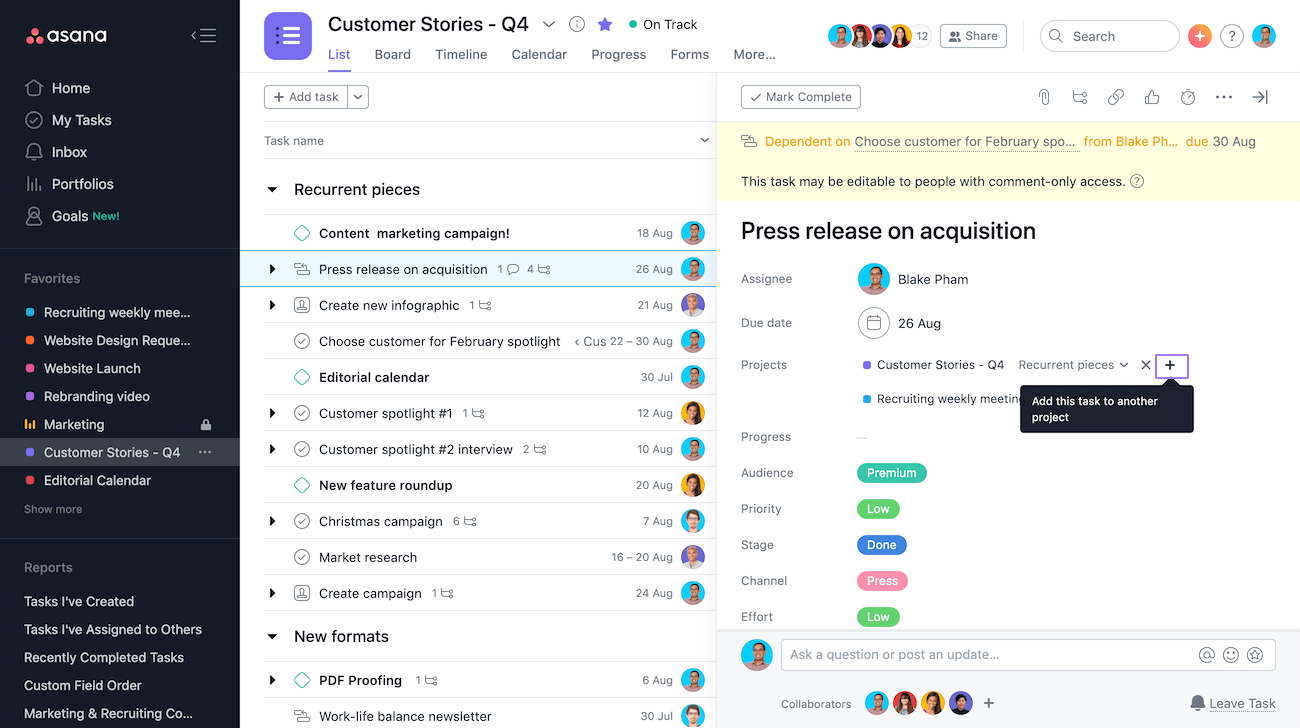
To add the task to another project:
Hover over the project name in your task pane, and click the + icon.
Press
Tab+Pon your keyboard to quickly focus on the projects field.
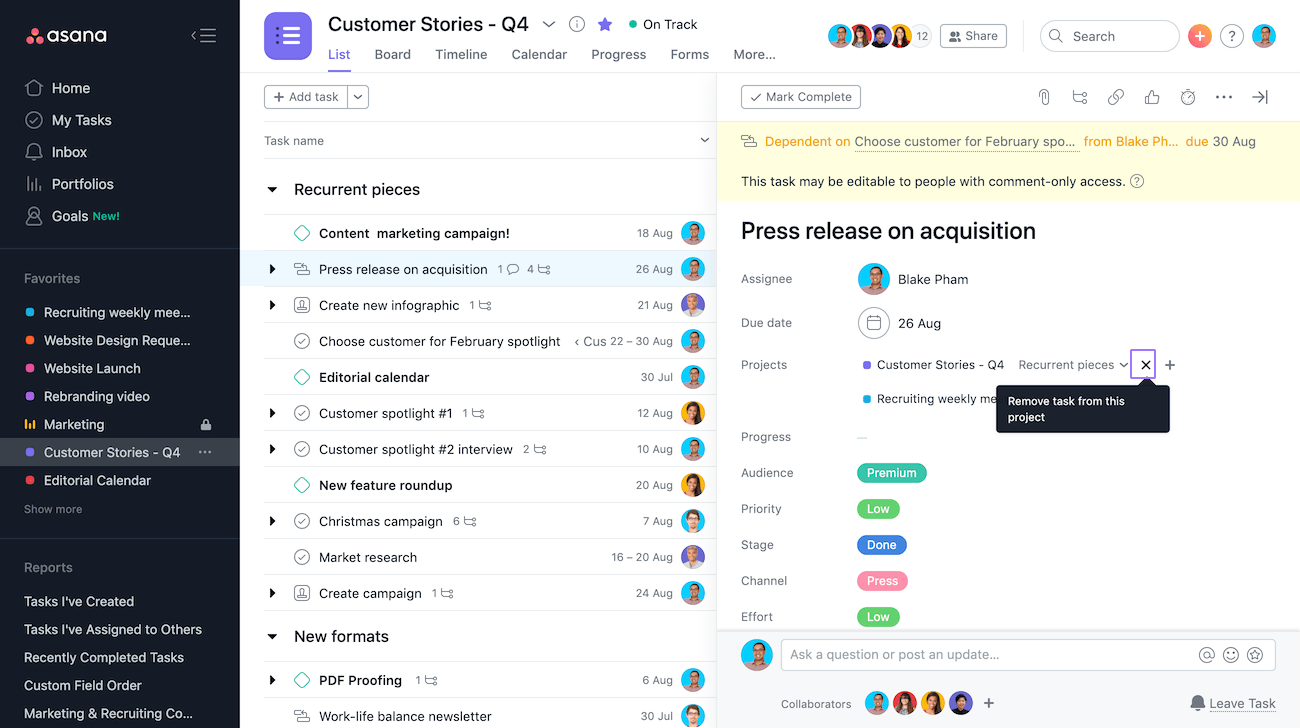
To remove the task from a project:
Hover over the project name in your task pane. Click the X icon next to the project to remove the task from a project.
Task Description
Task descriptions allow you to describe, give directions, or add any other context for a task.
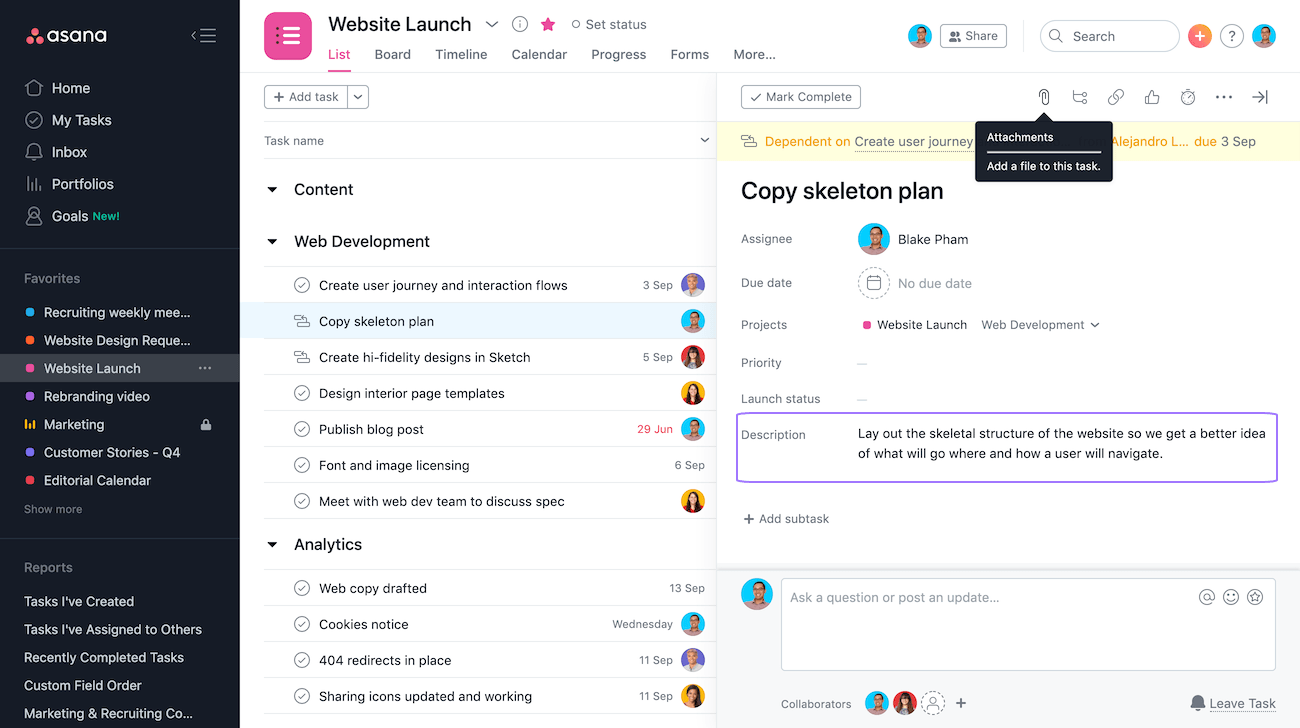
The descriptions field is in the right pane of each task. Click into the field to begin editing it.
Task Descriptions support rich text and emojis.
Likes
Use a Like to quickly confirm, approve, or praise your teammate's work.
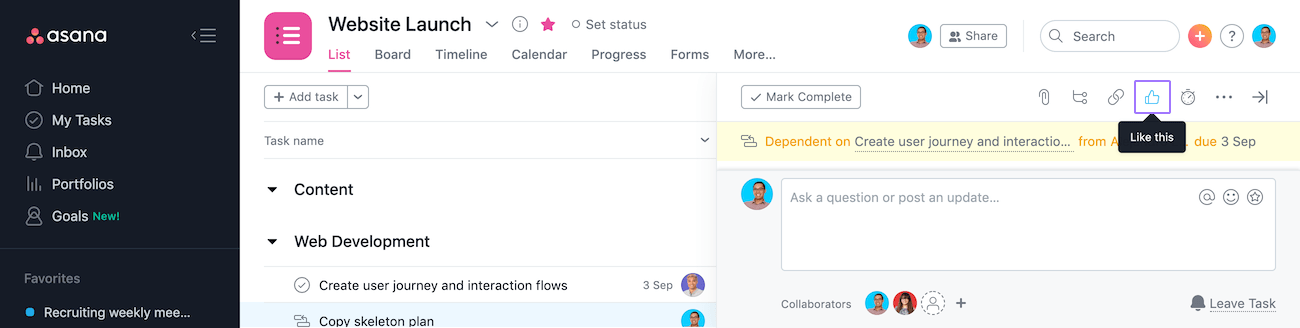
To like a task:
Click the thumbs up icon from the right pane.
You can also like tasks via Inbox notifications.
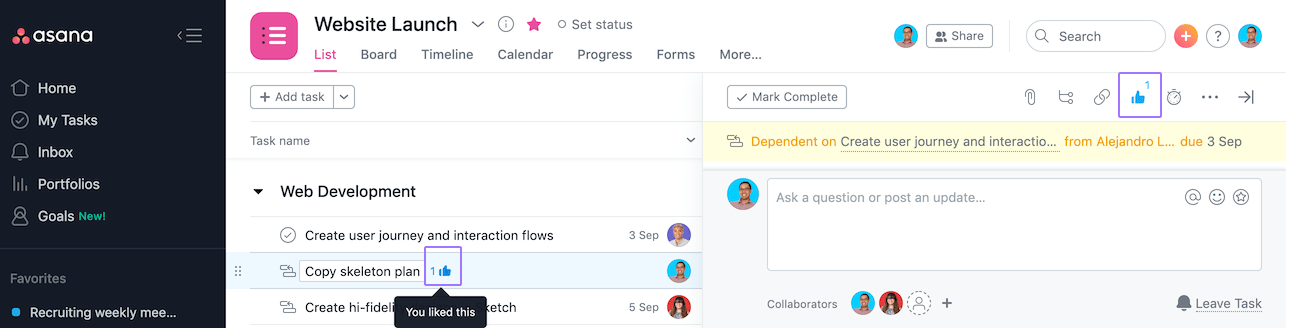
Once the task is liked, it will appear:
- Next to the task's name in the left pane left pane Read more
- At the top of the right pane right pane The right pane holds the details of a task or Conversation.Read more
To un-like the task, simply click the thumbs up icon again.
You will see a like option for:
- Tasks
- Task comments comments Comment on a task or conversation to offer help, answer questions, and help move work forward.Read more
- Task attachments attachments A file that is attached to a task or conversation.Read more
- Task completion
You will also get a notification that you have received a like through your Inbox Activity feed.
Tags allow you to give tasks additional context or to group similar tasks for easy viewing.
You might use a tag to track the state of a task or to categorize them.
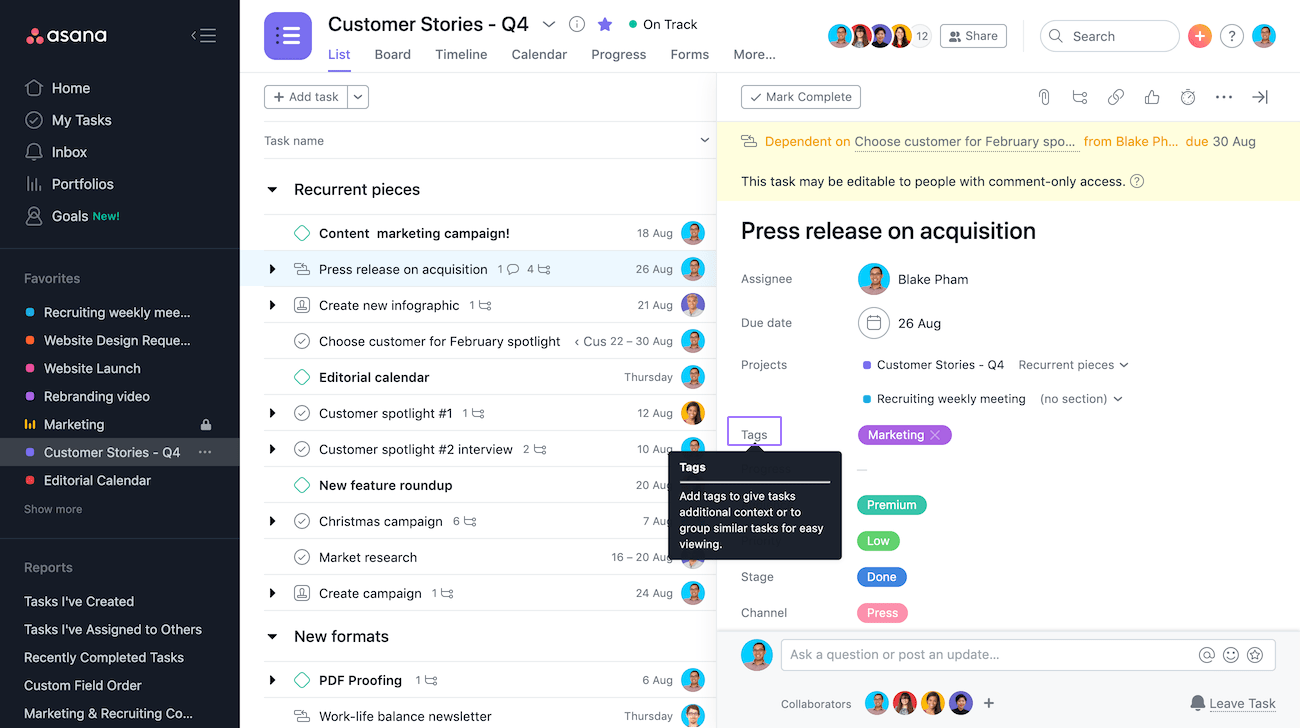
Tags on a given task will appear under Projects.
Click the tag's name to view a full list of tasks associated to that tag.
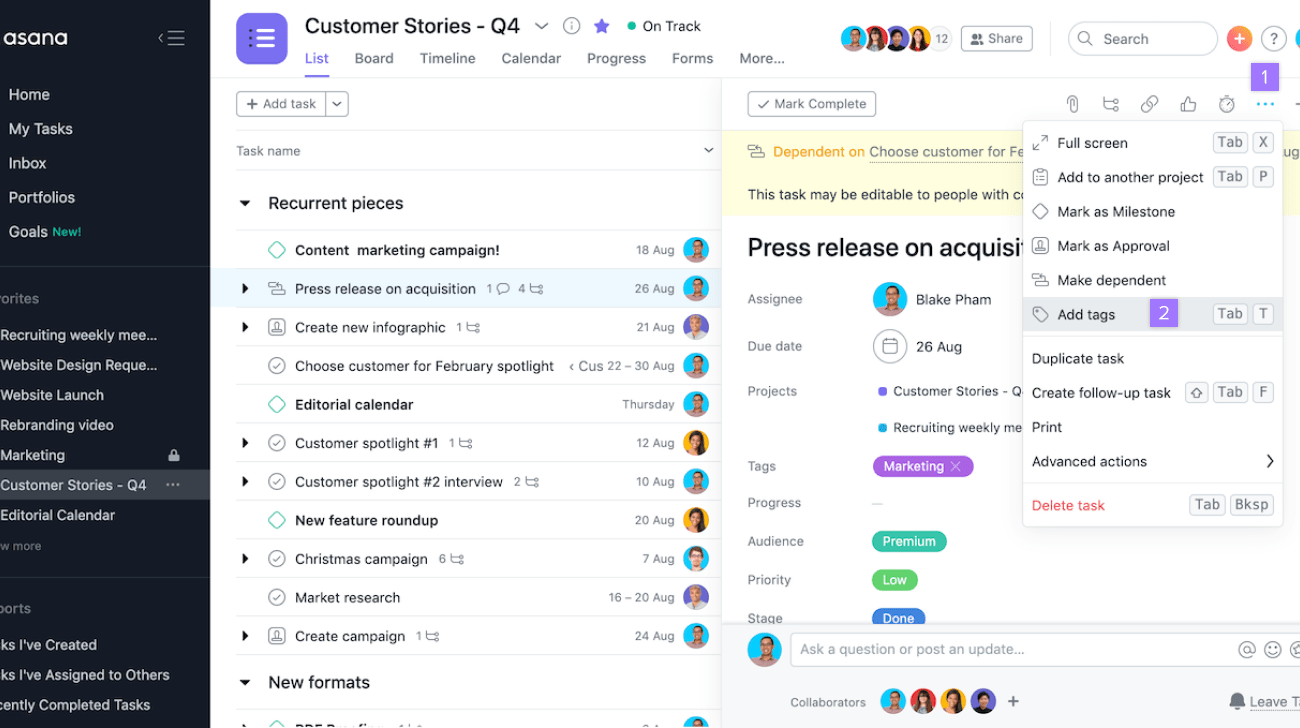
To add a tag to a task:
- Click the three dot icon from the top of the right pane to view a drop down menu
- Select Add tags
Press
Tab+Tto focus on the tag field.
To remove a tag from a task:
Simply hover over the tag's name and click the X icon that appears.
Create Tags
You simply choose Add another tag from the + symbol at Tags which then gives you an opportunity to create a new tag that may offer your tasks better context.
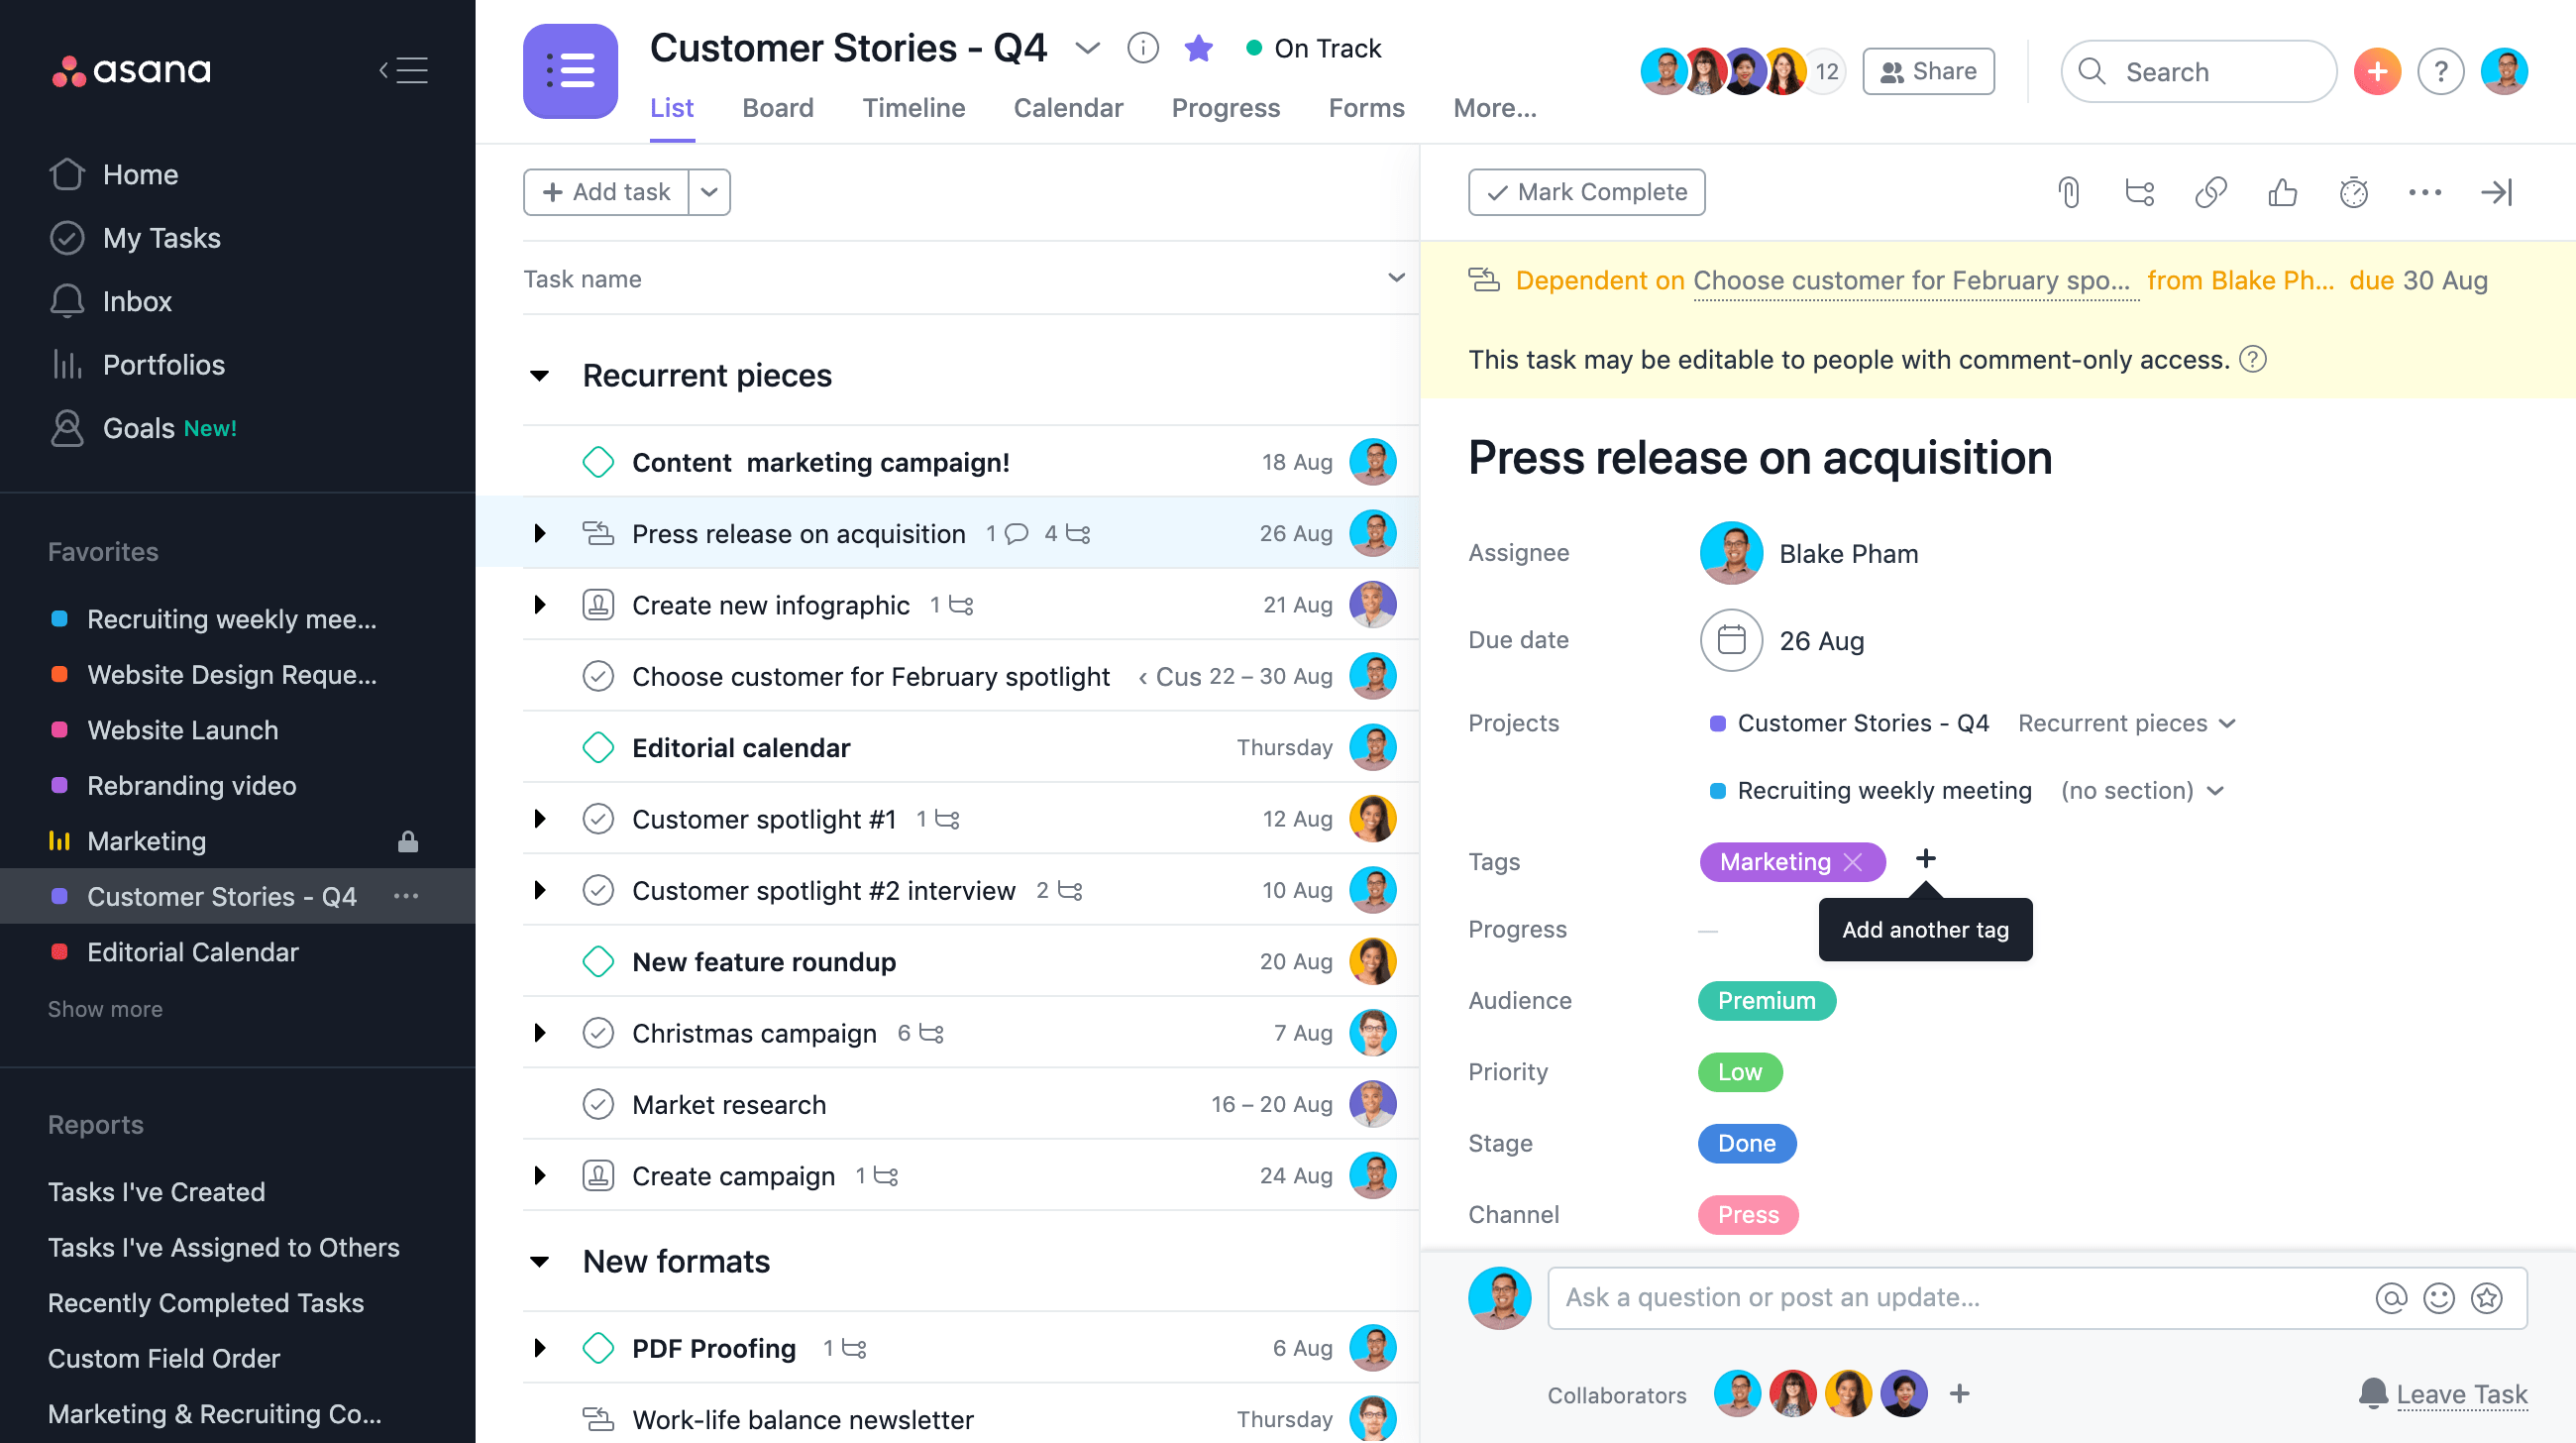

To create a new tag:
- Enter the name of your tag
- Select +Create tag for new tag
When typing the tag name, you will see a drop down menu of existing tags with similar names. Select a tag from the drop down if you are looking to add the task to an existing tag.
Rename or Delete Tags
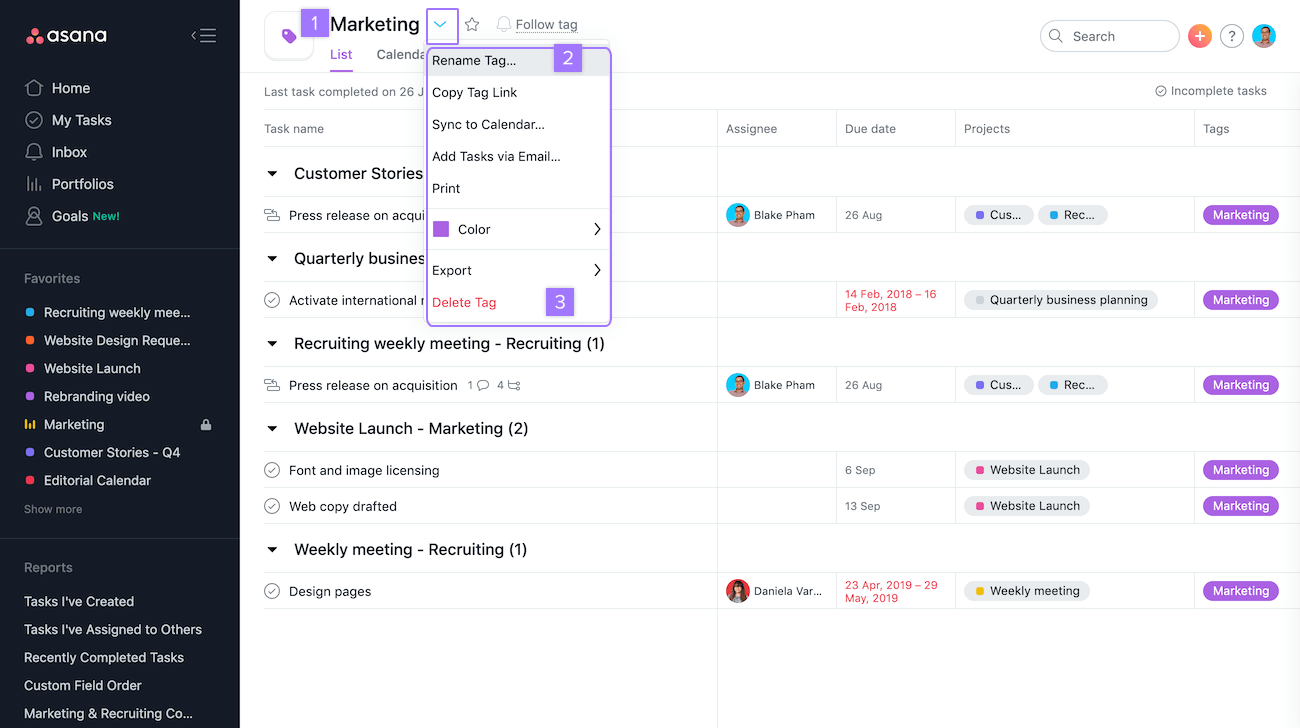
Click the tag's name and you will navigate to another page with a list of tasks associated to the tag.
To rename or delete a tag:
- Click to view tag actions via the drop down arrow
- Select Rename Tag from the options to rename
- Select Delete Tag from the options to delete
Once a tag is deleted, all tag followers will get an email notification about the deletion with the tag ID. If the deletion was in error, anyone can contact us with the ID to have the tag restored.
Tag Permissions
- Tags associated with a private task will be searchable by the assignee and followers of that task
- Tags associated with tasks within a private project will be searchable by the Members of that project
- All tags will be searchable via the API
Tag Colors
Use tag colors to make your tags more visually distinct.
To edit a tag's color:
- Click the tag's name from the right pane (or main pane). Notice that a list of tasks associated to the tag appear in the main pane.
- Click the drop down arrow from the header
- Select Set Highlight Color This will give the tag name a color in the main pane and the right pane
Using tags vs. custom fields
Tags and custom fields allow you to categorize, filter, and denote information in Asana. We strongly advocate for custom fields for standard use across an Organization because they are more visible and robust, while tags are more informal. Here some scenarios to help you decide:
Use custom fields if you:
- Want to add certain data to all the tasks in a project
- Have standard information you need to track on tasks across projects (e.g., priority level, time costing, work stage)
- Want to make sure your teammates fill out certain information for each task in a project
- Need to sort or search by specific data fields
Use tags if you:
- Need ad-hoc tagging, you have unlimited options, or aren't quite sure what needs to be tagged at the time of creation
- Need to see the tag from My Tasks
- Only need to mark a few tasks within a project
- Want to mark template tasks
How To Create A Tag In Asana
Source: https://asana.com/guide/help/tasks/fields
Posted by: crenshawsleaspold1954.blogspot.com
0 Response to "How To Create A Tag In Asana"
Post a Comment